Hashnode is a written content creation platform for developers, designed to help developers own a blog with the option of a custom domain for free. Hashnode provides an API (Application Programming Interface), that can be utilized in displaying articles on any platform, creating, editing, and even deleting articles. In addition, replies and reactions to each article can also be fetched and modified.
Pre-requisites
For the scope of this tutorial, basic knowledge in:
- JavaScript (React.js)
- HTTP Requests
- GraphQL
are required.
In addition, you must have a Hashnode account with at least one article published already.
Getting Started
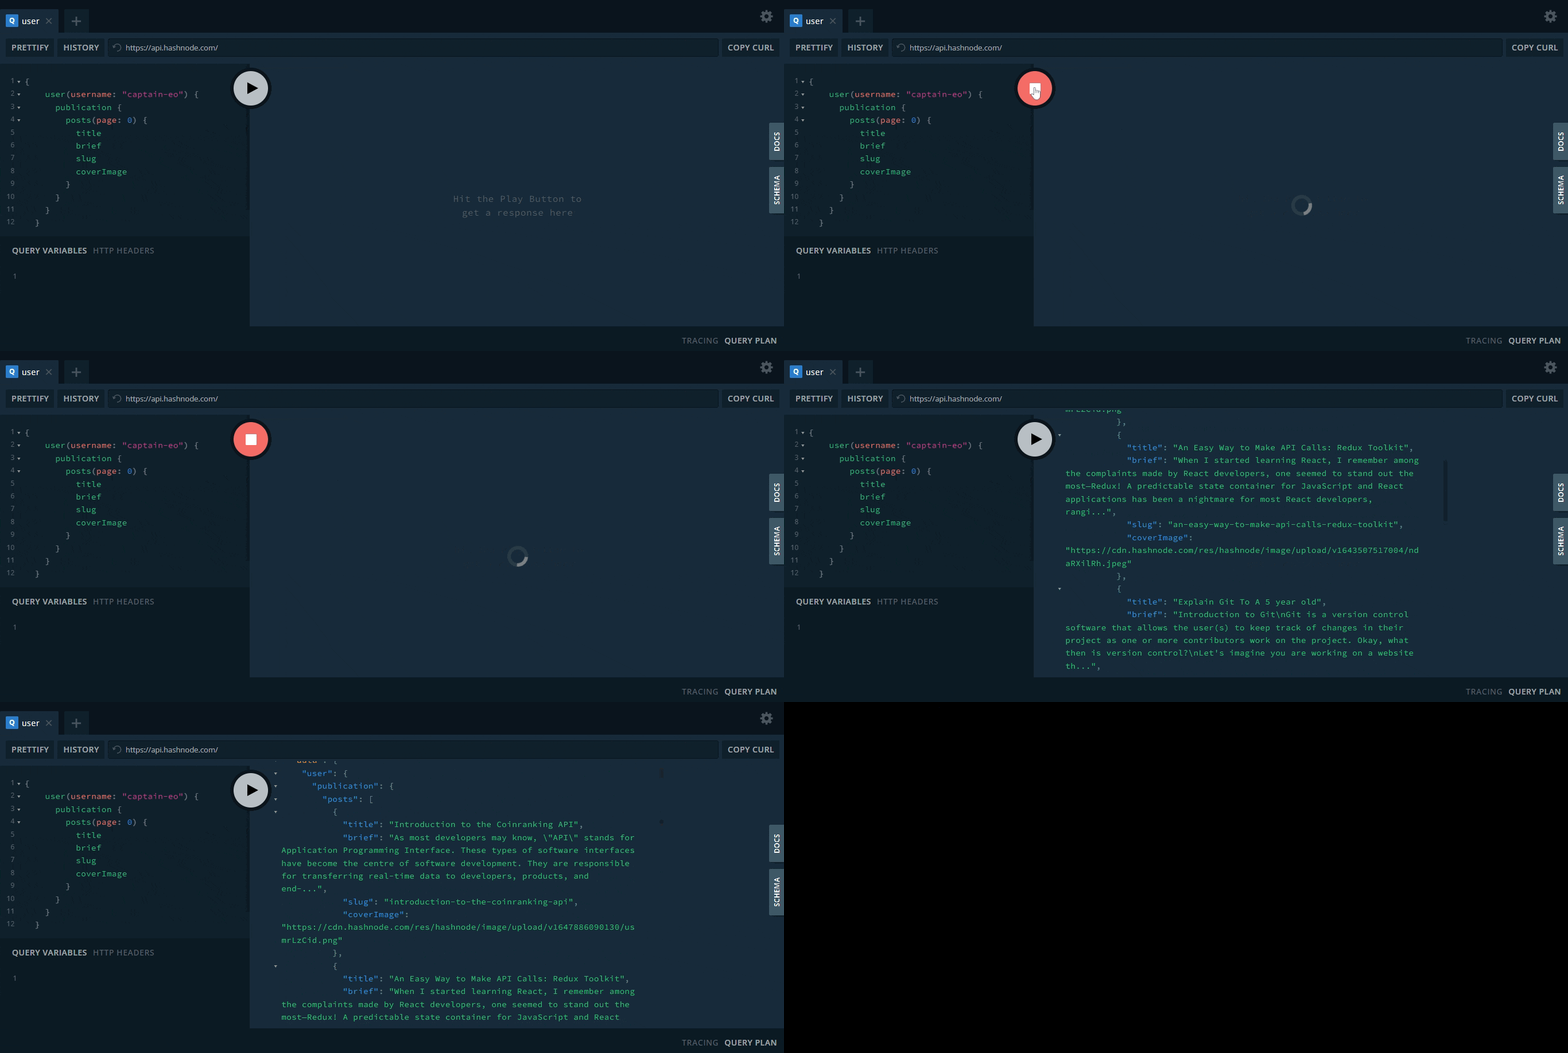
The first step we would be taking is to visit the Hashnode API Playground. Here, you can input your Hashnode username and send a mock request (query) that would bring back a response from the API. This enables us to view the schema and how it is structured.

Play around in the API Playground by sending different query parameters and see what is returned. What's more, you can check out the docs and schema on the right sidebar of the playground.
Even though the Hashnode API does not necessarily require any form of authentication, some queries and manipulations would require it. In this regard, a Personal Access Token (PAT) needs to be obtained from the Developer tab of your account.
When the token has been obtained, simply include it as the value of the Authorization parameter in the HTTP header.
 However, for most of what you would be requesting, authentication will not be needed.
Fetching the Articles
We would be using a combination of React Query and Axios library to fetch these articles from the GraphQL API and display them on our user interface. To get started, simply install React query and Axios by running any of the following commands depending on your package manager:
#NPM
npm install react-query axios
#Yarn
yarn add react-query axios
Now, create a component that would contain all your code and JSX mark-up. We would be sending a POST request to the API using Axios, and for the data that we are sending in the POST request, we would need to provide an object with a property called query which in this case we set to ARTICLE_QUERY.
import axios from 'axios';
import { useQuery } from 'react-query';

// fetching articles using the hashnode graphql API

const endpoint = 'https://api.hashnode.com/';
const ARTICLE_QUERY = `
  {
    user(username: "<your hashnode username>") {
      publication {
        posts(page: 0) {
          title
          brief
        }
      }
    }
  }

`;
We need to also configure the promise, so we can get back our data, by using the useQuery hook from React Query, which returns an object called data. Our data is accessed through the response.data.data.
const Component = () => {

    const {data, isLoading, error } = useQuery("launches", () => {
        return axios({
          url: endpoint,
          method: "POST",
          data: {
            query: ARTICLE_QUERY
          }
        }).then(response => response.data.data);
      });

      if (isLoading) return "Loading...";
      if (error) return <div>{error.message}</div>;
             ..........
The expected data to be returned are the title and the brief. The former represents the title of each article and the latter, the first paragraph of each article. Both are strings.
Adding Queries
GraphQL makes it easy to get many resources in a single request, unlike REST APIs which require requesting from multiple URL endpoints.
More queries can be added to the object to return more data. For example, we can add the slug which represents the name of each article as shown in a URL.
const endpoint = 'https://api.hashnode.com/';
const ARTICLE_QUERY = `
  {
    user(username: "<your hashnode username>") {
      publication {
        posts(page: 0) {
          title
          brief
          slug
        }
      }
    }
  }

`;
We can attach the slug to the domain URL of your Hashnode blog to form a link to each article. For example:
{data.user.publication.posts?.map((post, i) => (
            <ProjectCard
              key={i}
              title={post.title}
              link={`https://<your hashnode domain>/${post.slug}`}
            />
          ))}
The above code shows a mapping of each article returned by the API, which would display a card of each article, with their titles, and a link to the article formed by attaching your domain URL to the slug parameter.
Let us also add the cover image of each article.
const endpoint = 'https://api.hashnode.com/';
const ARTICLE_QUERY = `
  {
    user(username: "<your hashnode username>") {
      publication {
        posts(page: 0) {
          title
          brief
          slug
          coverImage
        }
      }
    }
  }

`;
Now mapping them on the UI through the ProjectCard component would look like this:
{data.user.publication.posts?.map((post, i) => (
            <ProjectCard
              key={i}
              title={post.title}
              link={`https://<your hashnode domain>/${post.slug}`}
              imgUrl={`${post.coverImage}`}
            />
          ))}
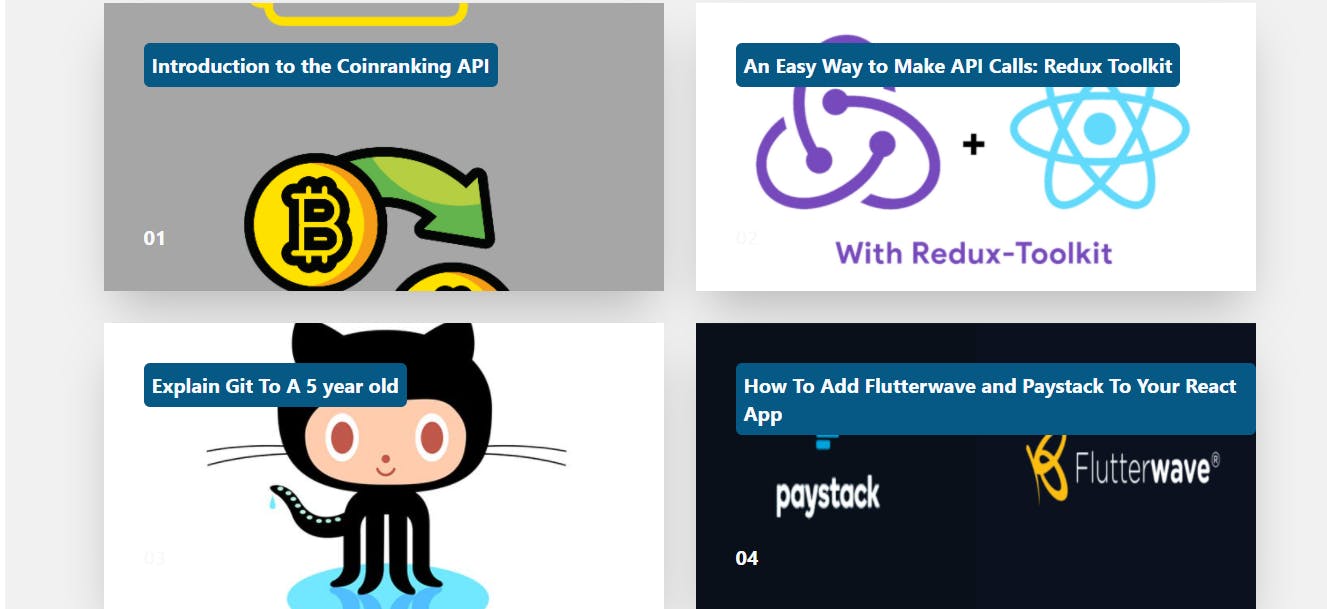
This should display each article present in your blog, alongside its title, link to the article, and the background cover image. Awesome!
You can style your display in however way you want, by styling how you want each parameter to display. Here is a picture of how I displayed my ProjectCard component using TailwindCSS.

Conclusion
The Hashnode API can be useful in displaying your articles on your portfolio as well as other blogs. Furthermore, new articles updates on your site automatically.
Using third-party libraries like Axios alongside React Query makes it easy for us to query and fetch GraphQL API data without much logic. Other methods such as FetchAPI combined with React Query can be employed as well.
You can do more with the Hashnode API including mutating replies, creating posts, deleting comments, and lots more.
I hope you enjoyed this simple article, kindly follow me on Twitter.


